Step 1. get ready
Install SmartBackup on your PC or a Windows backup machine of your choice. For more info refer to the Installation Guide
- Download Installer and follow installation instructions. Ensure you do a FULL Installation
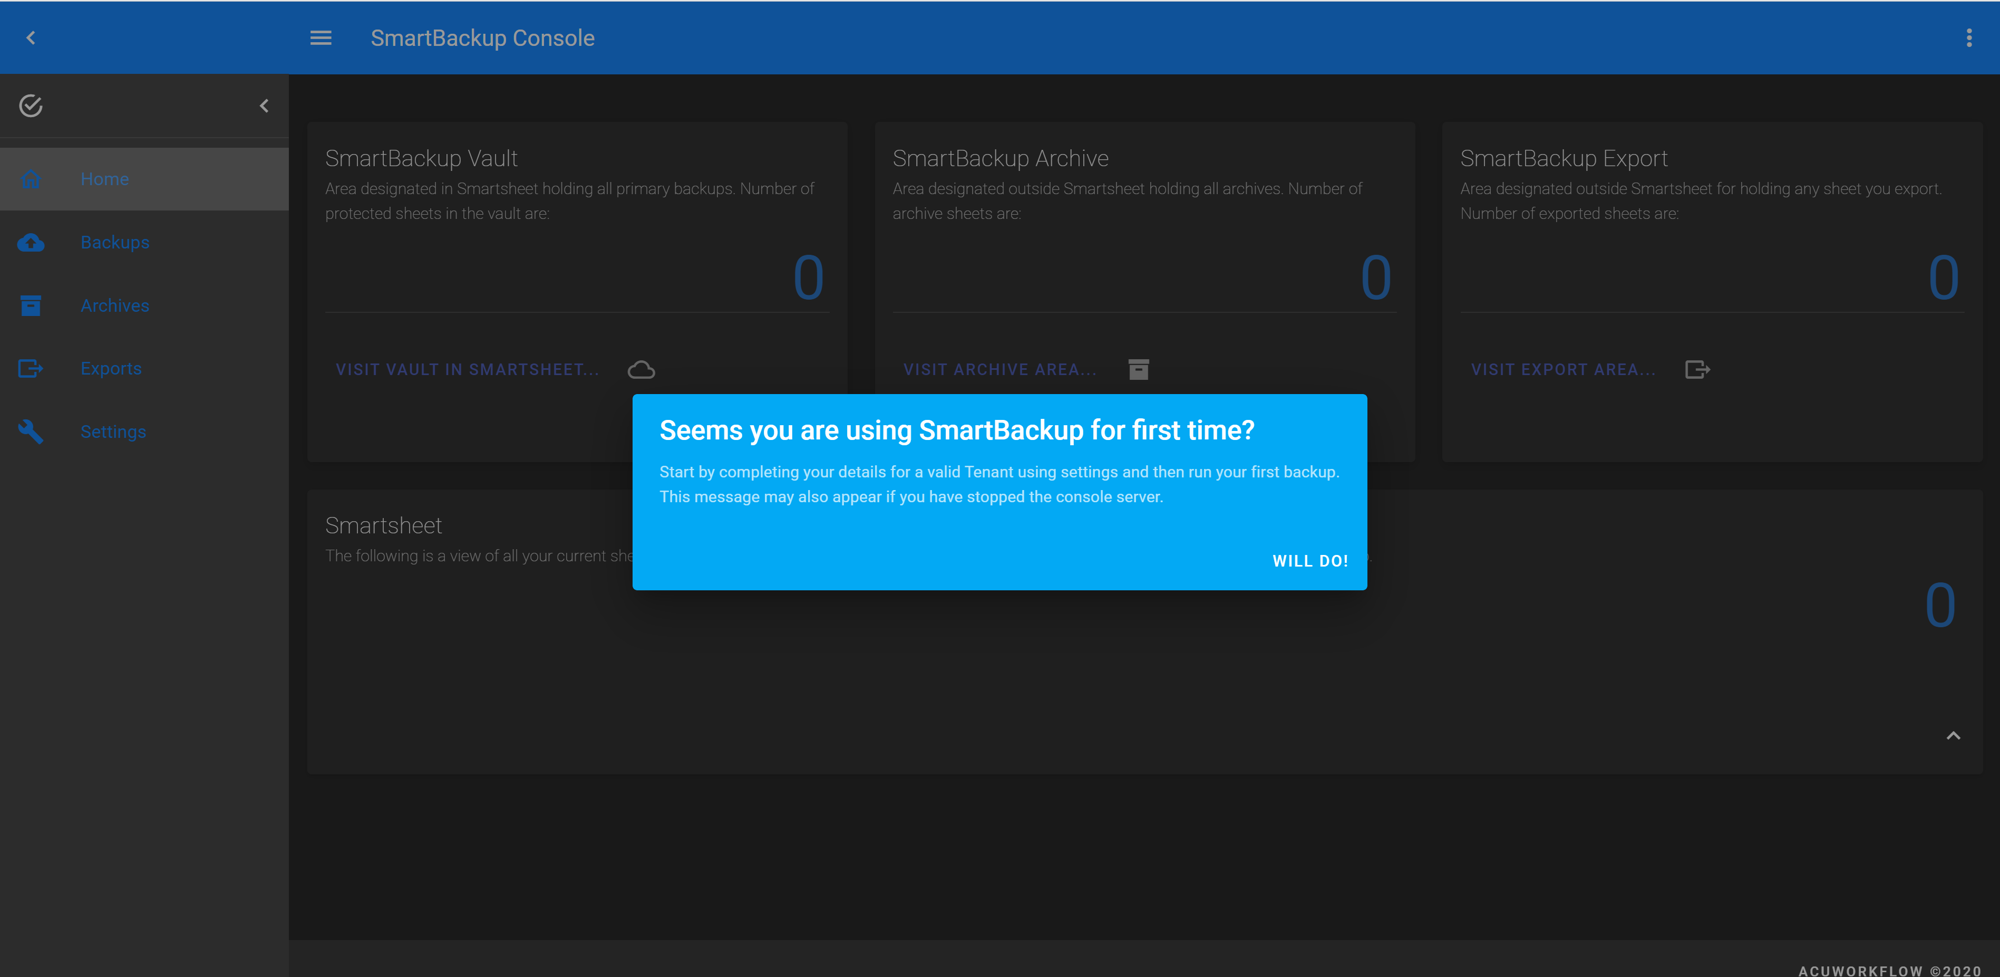
- On last Screen of Installation, tick checkbox to Invoke and after a while a browser window will appear showing the SmartBackup Console
- Click WILL DO and then click on Visit Smartsheet Vault which will take you to the Tenant Configuration.
Step 2. get set
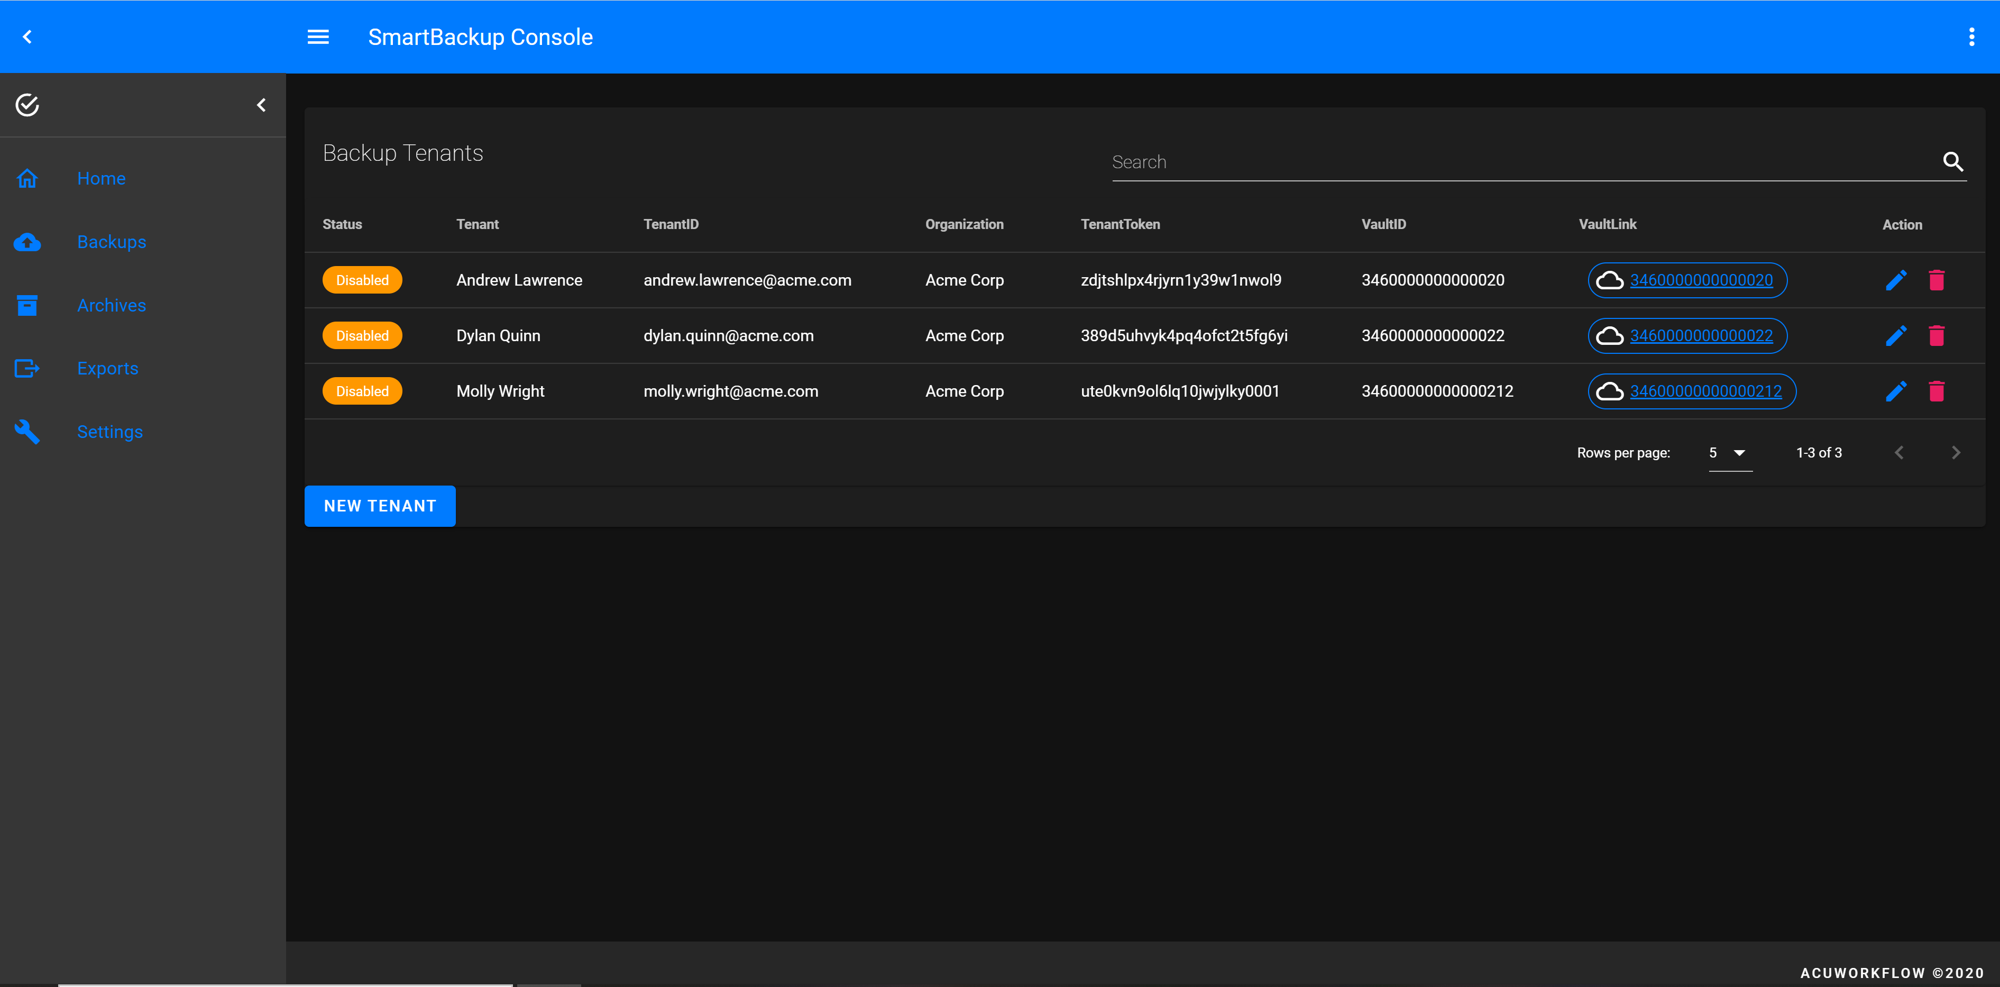
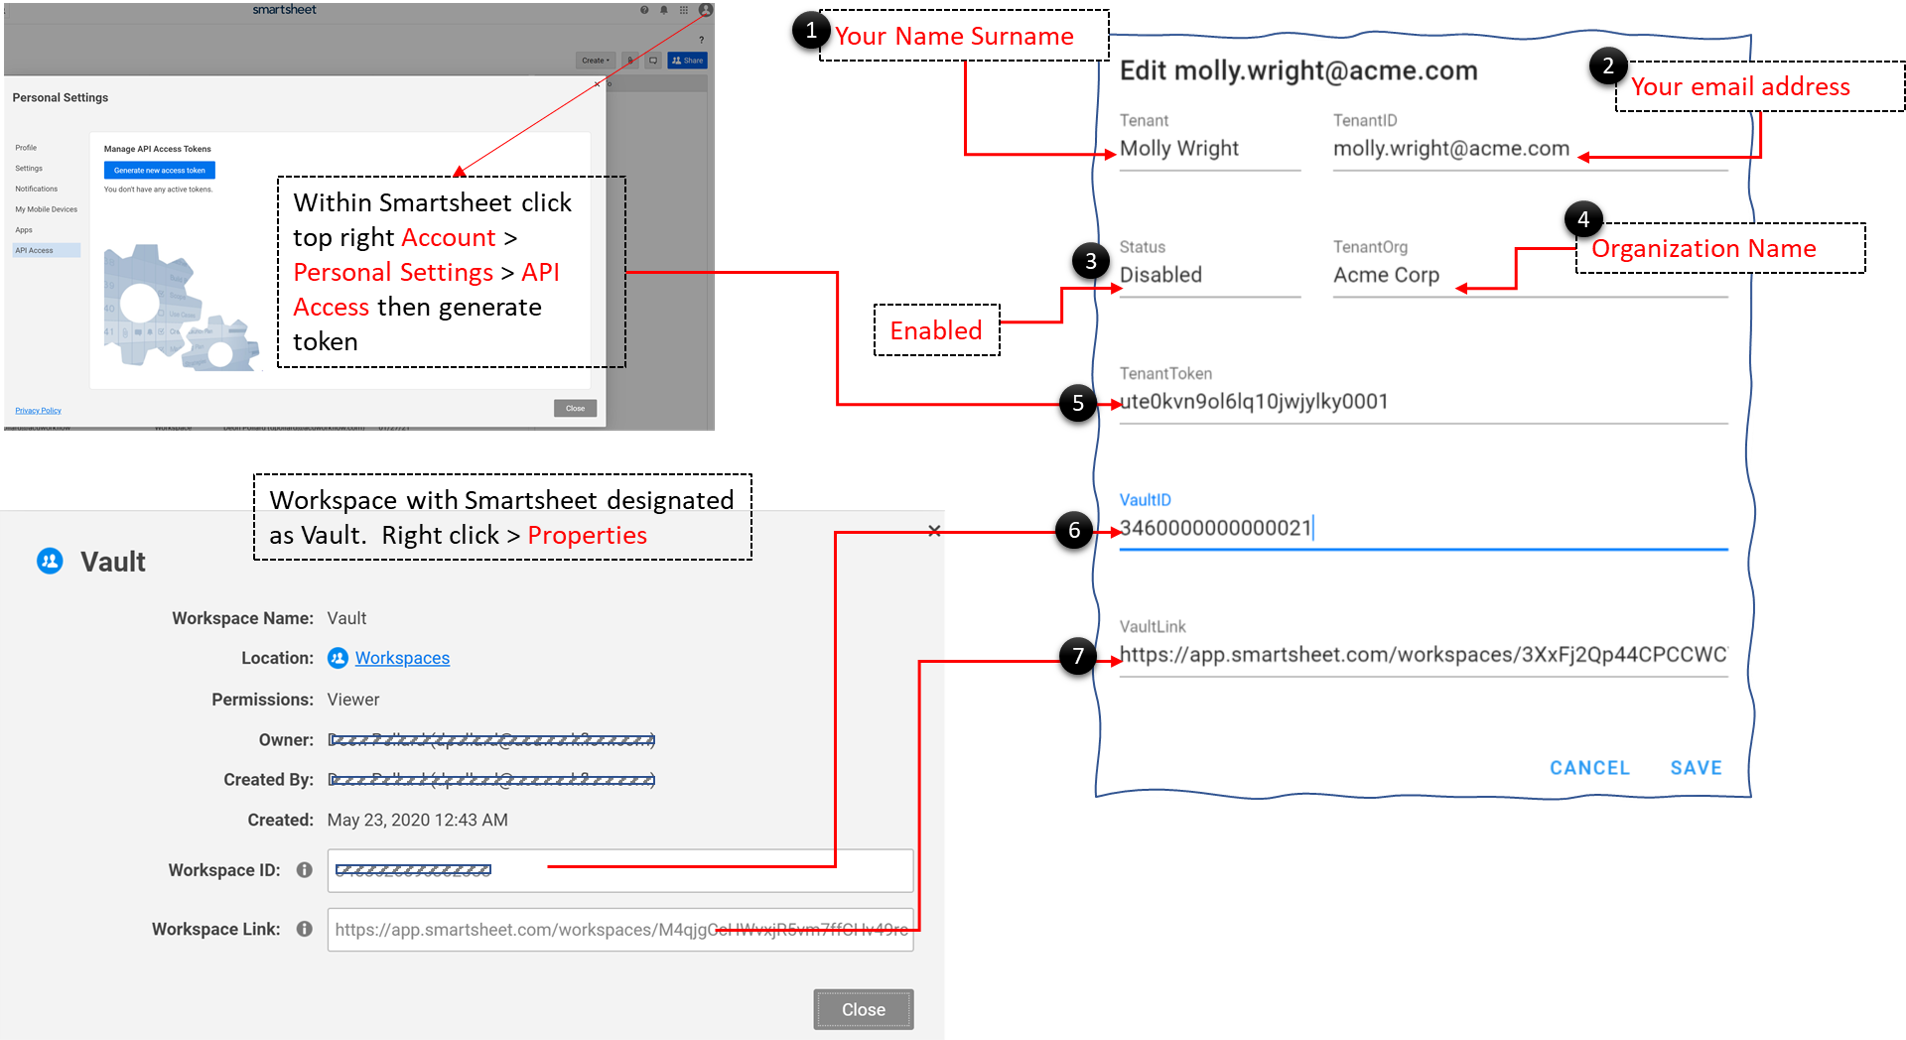
Edit to add your details. If you do not completely understand all the values or how to get them refer to the Setup Guide
- Click on the edit pen to overwrite first entry with your details
- Status must be Enabled, your email address must be supplied in tenantid
- API-Token is your Smartsheet API token
- Vault-ID and VaultLink is the Workspace within Smartsheet you designate as the Backup target area
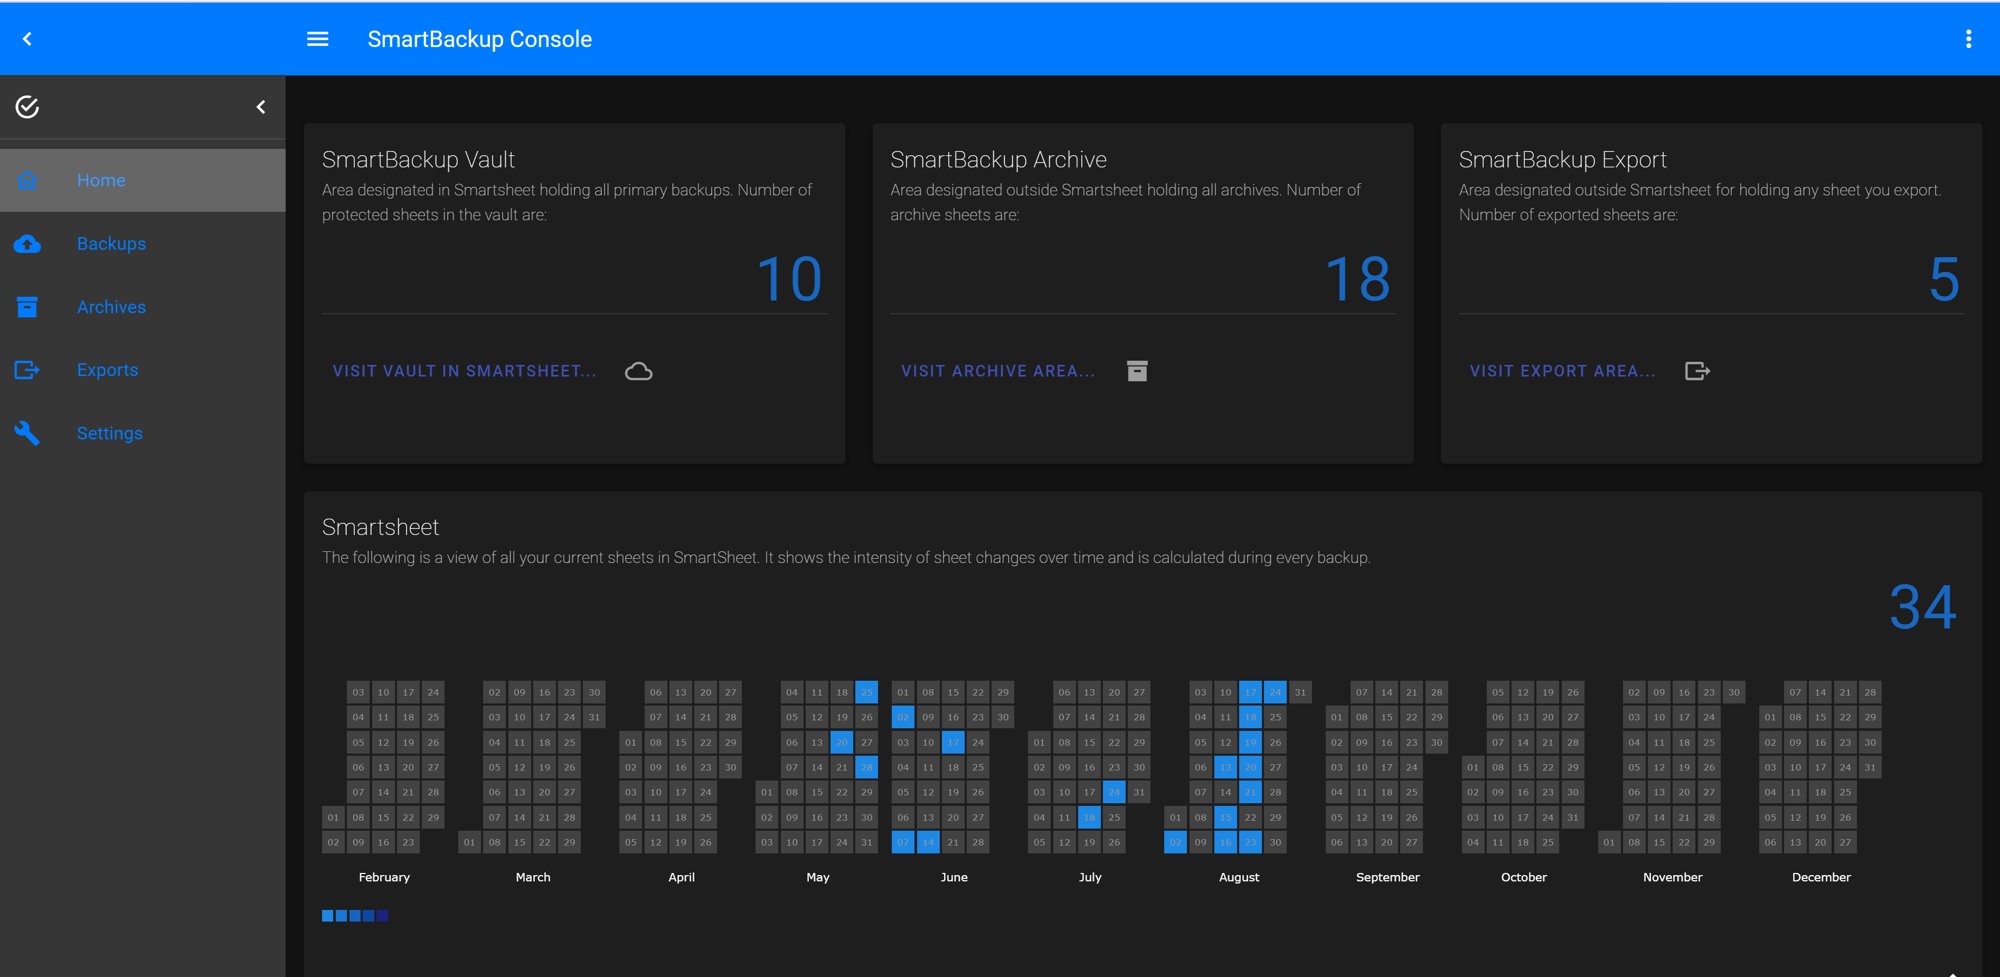
Step 3. get going
Run your first Backup. In future, for customising refer to the User Guide
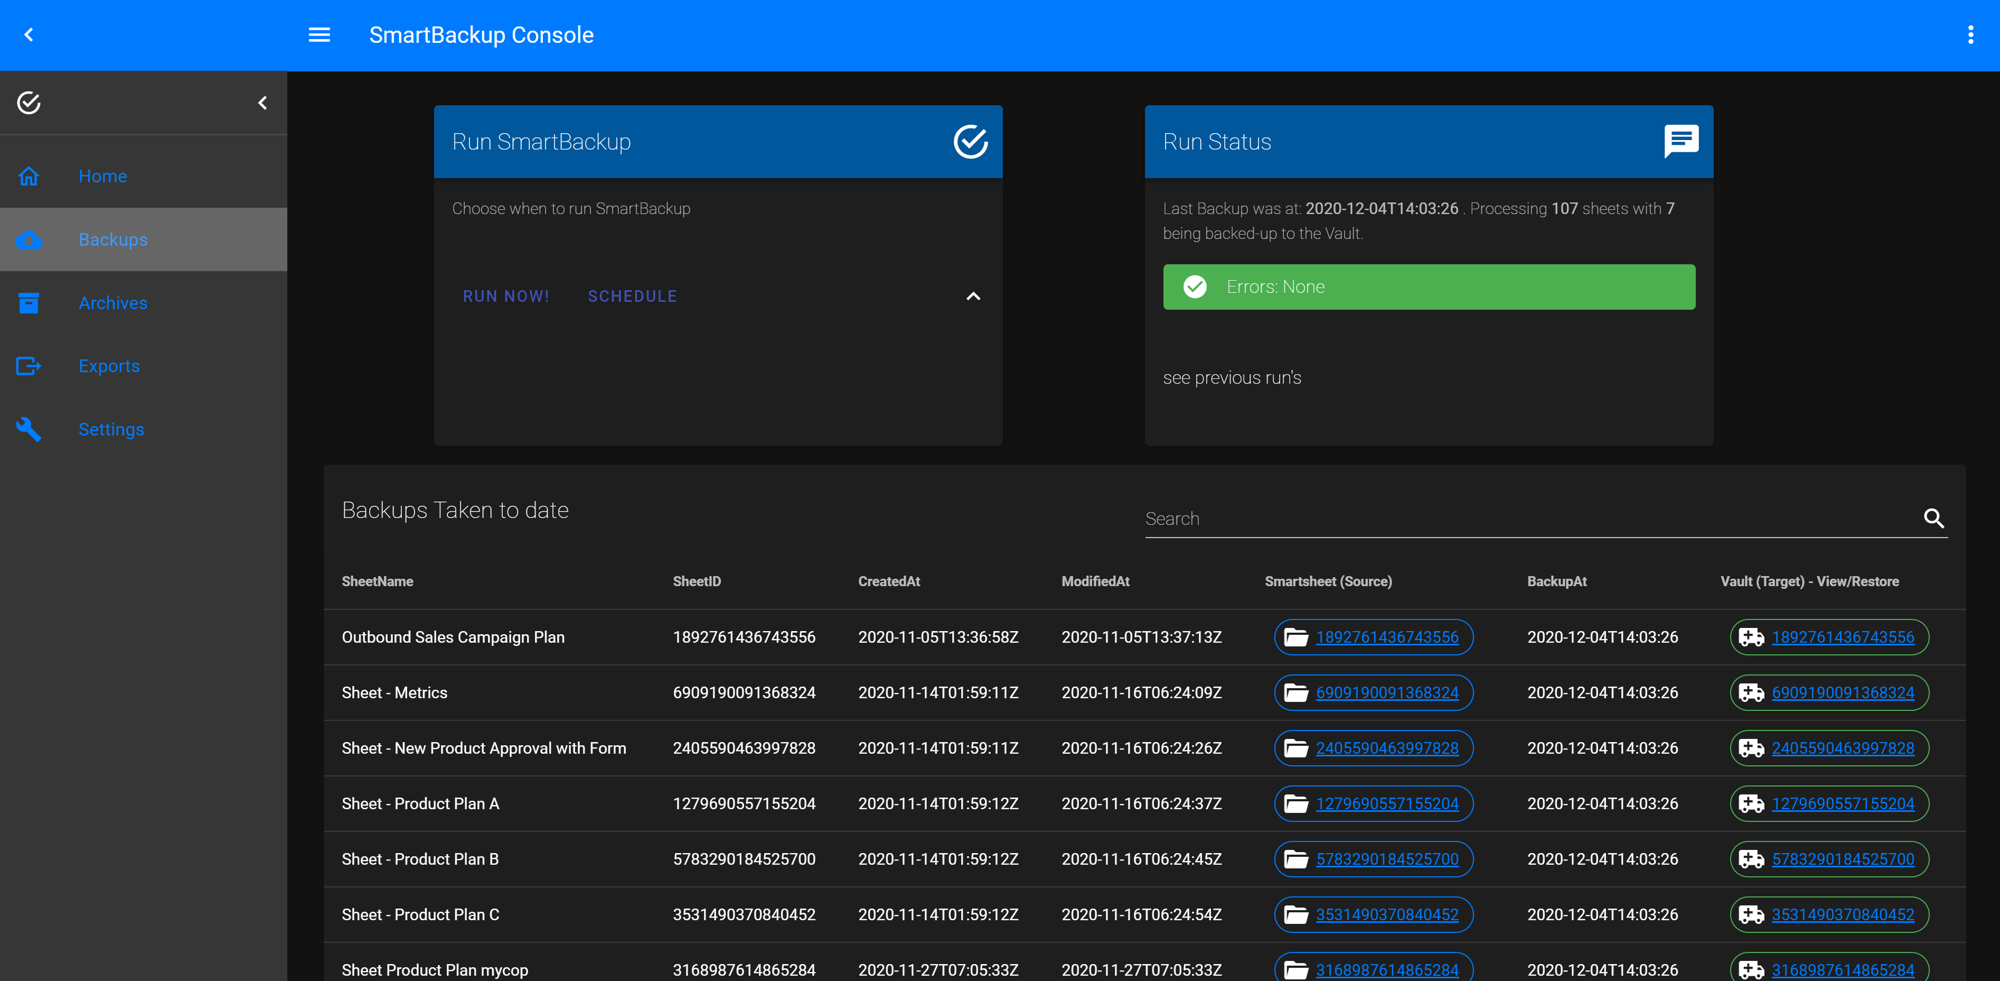
- Click on Backups menu item within leftmost menu
- Click on Run Now, after a short while a message will apear that a Backup run was started
- Please refresh (go to home or click on Backups menu item again or just enter on url) and after a while you will see the results of what was backed-up. You can click on Console Server icon to view details as the backup is running.
Happy days, your first Backup. You will also receive an email with the status of what was backed-up.
Visual to help complete Tenant details
If you selected the Enterprise Edition, even easier, you do not need any of the above. No User Api tokens or configuration. Smartbackup will automatically provision users from Smartsheet.
get really going
Pretty quickly you will be able to exploit the Export and Archive capabilities as well. If you want more info, please refer to the User Guide or the Reference Guide